
Module · Accounting & reports
Where to find it in the app
- Use it: Finance → Accounting & reports
- Turn it on/off: your business name (top-left) → Settings → Modules → Finance → Accounting & reports
Plan: Solo and Business · Module group: Finance
1. Overview
Purpose. The Accounting & reports turns the money you have made into a CSV file that imports straight into your accounting software, Xero, MYOB or QuickBooks, or that you hand to your bookkeeper. It removes double entry: you record things once, in HappierBiz, and your books stay in sync.
The BAS worksheet comes first. At the top of the screen your figures are laid out the way the Business Activity Statement asks for them, on one basis, for one whole lodgement period, with when it is due printed beside it. That is usually the only reason to open this screen at the end of a quarter. See 7h.
There are two exports, because there are two ways money reaches you:
- Invoices, everything you have invoiced. Use this if you raise invoices.
- Money received, every deposit, balance, payment and membership charge you actually took, one line each. Use this if you take payments without raising an invoice, which is most cafes, studios and party venues. See 7f.
You do not have to choose one for good. Most businesses use one of them; some use both, and if you do, read the warning in 7f about not counting the same sale twice.
Live Xero connection. Xero now also supports a live connection that pushes your documents straight into Xero as drafts, no CSV file needed. Connect it once (see 7d below) and you get live account/tax-rate dropdowns and a Push button per document. You can also make it hands-free: optional toggles send automatically, post a credit note when you refund a card payment (see 7e), and switch on three more streams, payment receipts (every booking deposit, balance and membership payment becomes a draft Xero invoice, so money that never went through an invoice still reaches your books), quotes (sent or accepted quotes become draft Xero quotes) and purchase orders (approved or sent POs become draft Xero purchase orders, booked to your expense account). Approved staff reimbursements go over as draft bills too. MYOB and QuickBooks stay CSV-only (the content below). Either way, Xero stays the source of truth, everything pushed arrives as a draft you review and approve in Xero; nothing posts to your ledger without your say-so.
What it does not do. The invoices CSV export never includes quotes or draft invoices, only real, issued invoices that are Sent or Paid (the live quote stream above is separate and opt-in). For MYOB/QuickBooks it does not connect live (CSV only). Even with the Xero live connection it does not push payments, a paid invoice still arrives in Xero as an unpaid draft for you to reconcile there.
2. When to use it
- At BAS time or month-end, to give your bookkeeper a clean file.
- Whenever you want your paid income reflected in your accounts.
- As a one-off, to reconcile a date range against a bank statement.
- Any time you would otherwise be retyping figures out of your email.
3. Required permissions
- View / export accounting (
accounting.view).
By default the Owner and Manager roles have this. Grant it to other roles
on Team → Staff list if you want, e.g. a bookkeeper login.
4. Navigation path
Finance → Accounting & reports
The Finance group only appears if you have at least one finance module (Payments, Invoicing or Accounting) switched on and your role can see it.
5. What you'll see
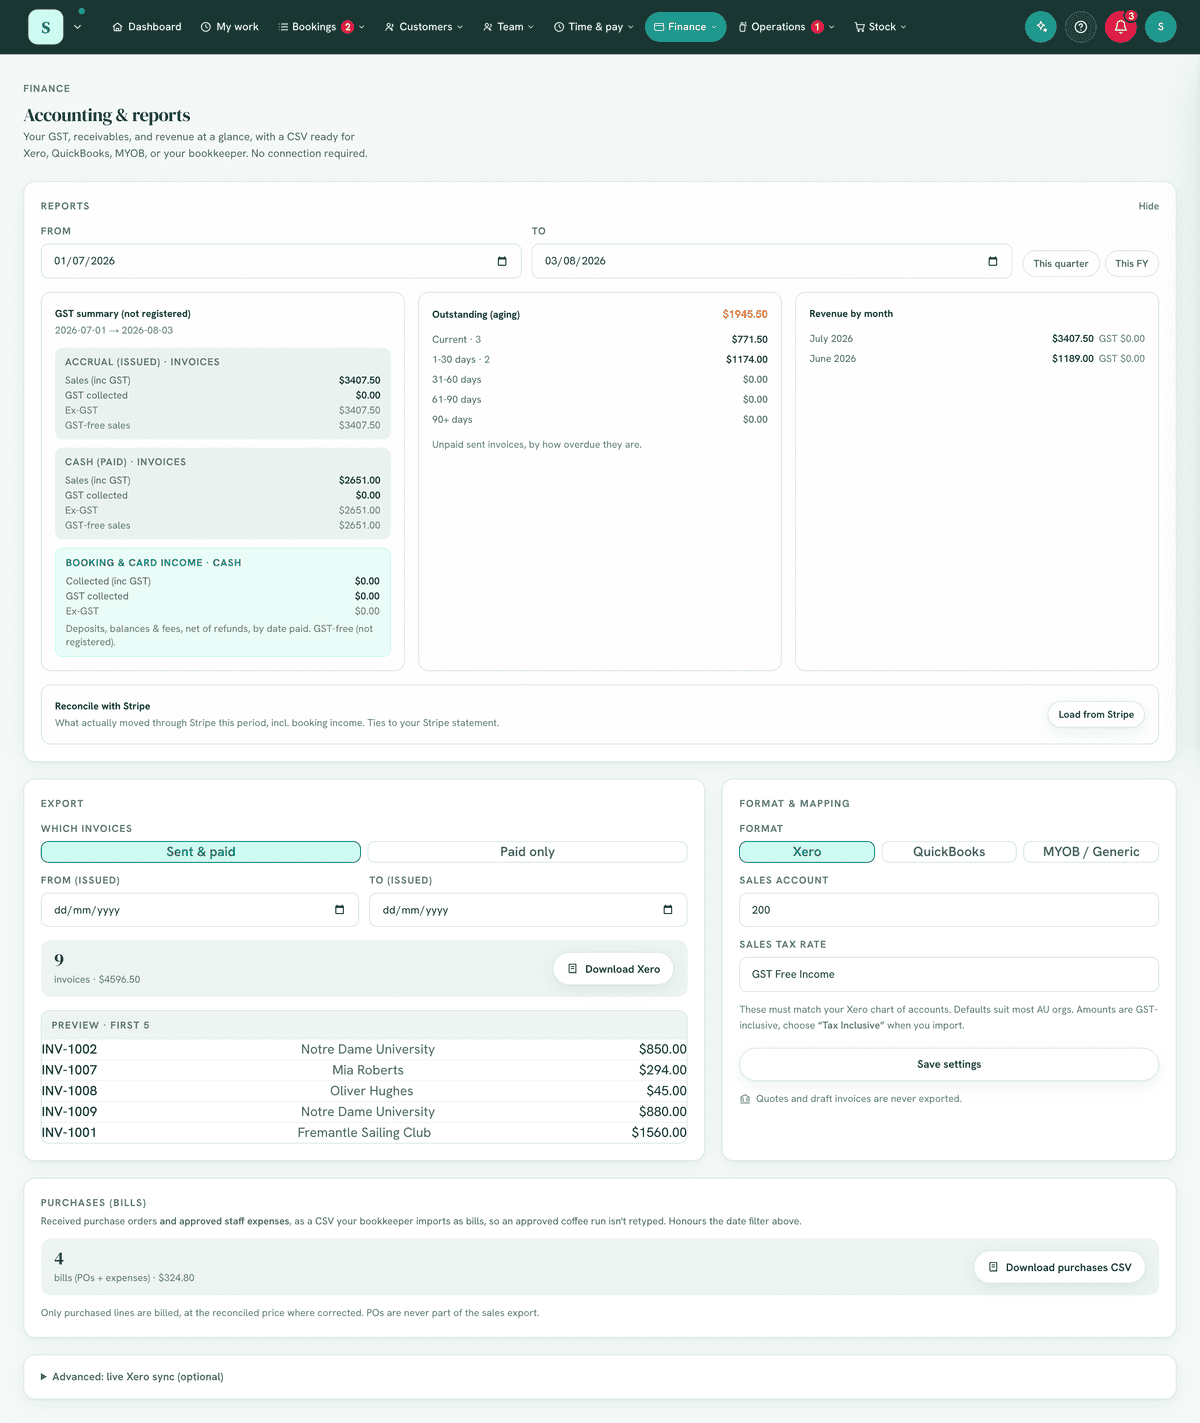
One set of dates for the whole page. The Dates panel near the top sets the period every panel below it covers, and says which: "Every panel below covers 1 July 2026 to 11 September 2026." Presets for the month, the quarter, the financial year and All dates. It opens on this financial year so far.
There used to be three separate From/To pairs on this screen, and the one that governed the two files an accountant asks for started empty, which meant your whole history. One period, said once.
The BAS worksheet keeps its own picker, and that is on purpose. It picks lodgement periods, whole quarters and months, which is a different question from "show me these dates". Mixing the two is how a quarter-to-date figure gets lodged.
Then two panels side by side.
Left, Export
- Which invoices, a two-way toggle: Sent & paid or Paid only.
- A summary box: the number of matching invoices and their total dollar value, with a Download button. Invoices are dated by the day each was issued.
- A Preview of the first five matching invoices (number, customer, amount).
Right, Format & mapping
- Format, Xero, QuickBooks, MYOB or Other / bookkeeper. Your choice applies to both exports, so you set it once.
- For Xero and MYOB: a Sales account field, because both put an account code on every line. For Xero there are also Tax rate fields, and when Xero is connected the account and tax rate become live dropdowns pulled from your Xero org's real chart of accounts and tax rates. MYOB needs no tax setup: it uses MYOB's own standard codes, GST and FRE.
- Purchases and staff expenses, an Expense account (QuickBooks calls it a category), plus expense tax rate names for Xero. Every package needs an account on each line of a bill, so the purchases CSV cannot be imported without this. If you leave it empty the purchases panel says so before you download, rather than letting the import fail.
- A Save settings button, and a reminder that quotes and drafts are never exported.
Money received. Below those, a full-width Money received panel with its own date range and its own Download button (see 7f). This is the export for money that never went through an invoice.
Sync to Xero (when connected). Xero is connected under
Settings → Connections, which also carries Setup, step by step (one screen
that walks from connecting to the first pay run, ticking each step off as it is
saved) and a printable Setup guide (PDF) for owners new to Xero; a line at
the bottom of this page points there, and
says which organisation you are connected to once you are. Once connected, a
Sync to Xero panel lists the documents waiting to go
with a per-row Push button and a Push N to Xero bulk button, showing a
Synced badge or Retry on error. Invoices are always listed; payment
receipts, quotes and purchase orders appear once you have ticked them in
Automatic Xero sync (see 7e), each labelled with its kind.
Purchases (bills). Below the export panels, a Purchases (bills) section counts your received purchase orders and approved staff expenses and downloads them as a bills CSV (see 7g). It shows the GST you can claim on them, and tells you when some of it is being left on the table. Beside it, The receipts themselves downloads every receipt in the period as one zip, named and indexed for your accountant (see 7g-i).
6. Turning it on
- Go to
Settingsand open the Tools list. - Under Finance, switch on Accounting & reports. (It pairs naturally with Invoicing, which produces the invoices it exports, turn that on too if it isn't already.)
- Open
Finance → Accounting & reports.
If the module isn't in your plan it appears locked, upgrade on
Plan & billing.
7. Step-by-step tasks
7a. Choose your format (one-time setup)
- Open
Finance → Accounting & reports. - In Format & mapping, choose your package.
- Xero, a Xero-shaped sales-invoice CSV, ready for Xero's invoice import.
- QuickBooks, matches QuickBooks Online's invoice-import template
(
Settings → Import data → Invoices). - MYOB, matches MYOB AccountRight's Service Sales import (
File → Import/Export Assistant → Import → Sales). Its wizard asks you to match the columns the first time and remembers it after that. - Other / bookkeeper, a clean, neutral CSV for a package we do not have a template for, or to hand to a person.
- If you chose MYOB, set your Sales account to your MYOB income account number, which usually looks like 4-1000. Nothing else is needed: MYOB's own GST and FRE codes are used, and the Inclusive column tells MYOB the amounts already include GST.
- If you chose Xero, set:
- Sales account code, the account code in your Xero chart of accounts that sales should post to (default 200).
- Tax rate name, must match a tax rate in Xero exactly. If your business is GST-registered, this is your GST-on-income rate (default "GST on Income"); if you're not registered, it's your GST-free rate (default "GST Free Income").
- Select Save settings. You only need to do this once; it's remembered, and it applies to both the invoices export and Money received.
Free-text vs dropdowns. Until Xero is connected, Sales account and Tax rate are plain free-text fields, type the values exactly as they appear in Xero. Once connected, they become live dropdowns loaded from your Xero org, so you pick from the list instead of typing (see 7d).
Your GST-registered status comes from your business settings (set under Invoicing/Settings), and it decides which tax-rate field shows here. Individual invoice lines can also be marked GST-free in Invoicing, the export gives those lines your GST-free tax code automatically, so mixed invoices split their tax codes correctly.
7a-i. Things you sell that carry no GST
Being registered for GST is about your turnover, not about what you sell. Over $75,000 you must register, whatever you sell, so plenty of registered businesses sell things that legally carry no GST at all. In Australia the common ones are health services (physio, chiro, dental, psychology, most medical), approved childcare, some education, basic unprepared food and exports. Only you and your accountant can say which of yours are.
Tell HappierBiz which they are and it stops charging them GST:
- What you book out: open the offering in Experiences (whatever you call them) and under GST tick This is GST-free.
- Membership dues: open the plan in Memberships and tick Dues on this plan are GST-free.
- Invoice lines: mark the individual line GST-free in Invoicing, which has always been possible.
Both tick boxes only appear if you are registered for GST, because an unregistered business charges none on anything.
It does not change your price. A $110 GST-free appointment still costs the customer $110. What changes is who owns the ten dollars: today the app treats it as the ATO's, and ticking the box means all $110 is yours. Nothing on your booking page moves.
It applies from now on. Money you have already taken keeps whatever it was recorded as, so a BAS you have already lodged does not change under you. That is deliberate. It also means ticking the box does not fix a past quarter, so if you have been reporting GST on GST-free income, that is a conversation with your accountant rather than something this box undoes.
Once ticked, that income is kept out of 1A on your BAS worksheet, shown under G3 Other GST-free sales, and exported with your GST-free tax code so Xero, MYOB or QuickBooks do not add tax to it on import.
7b. Export a CSV
- Open
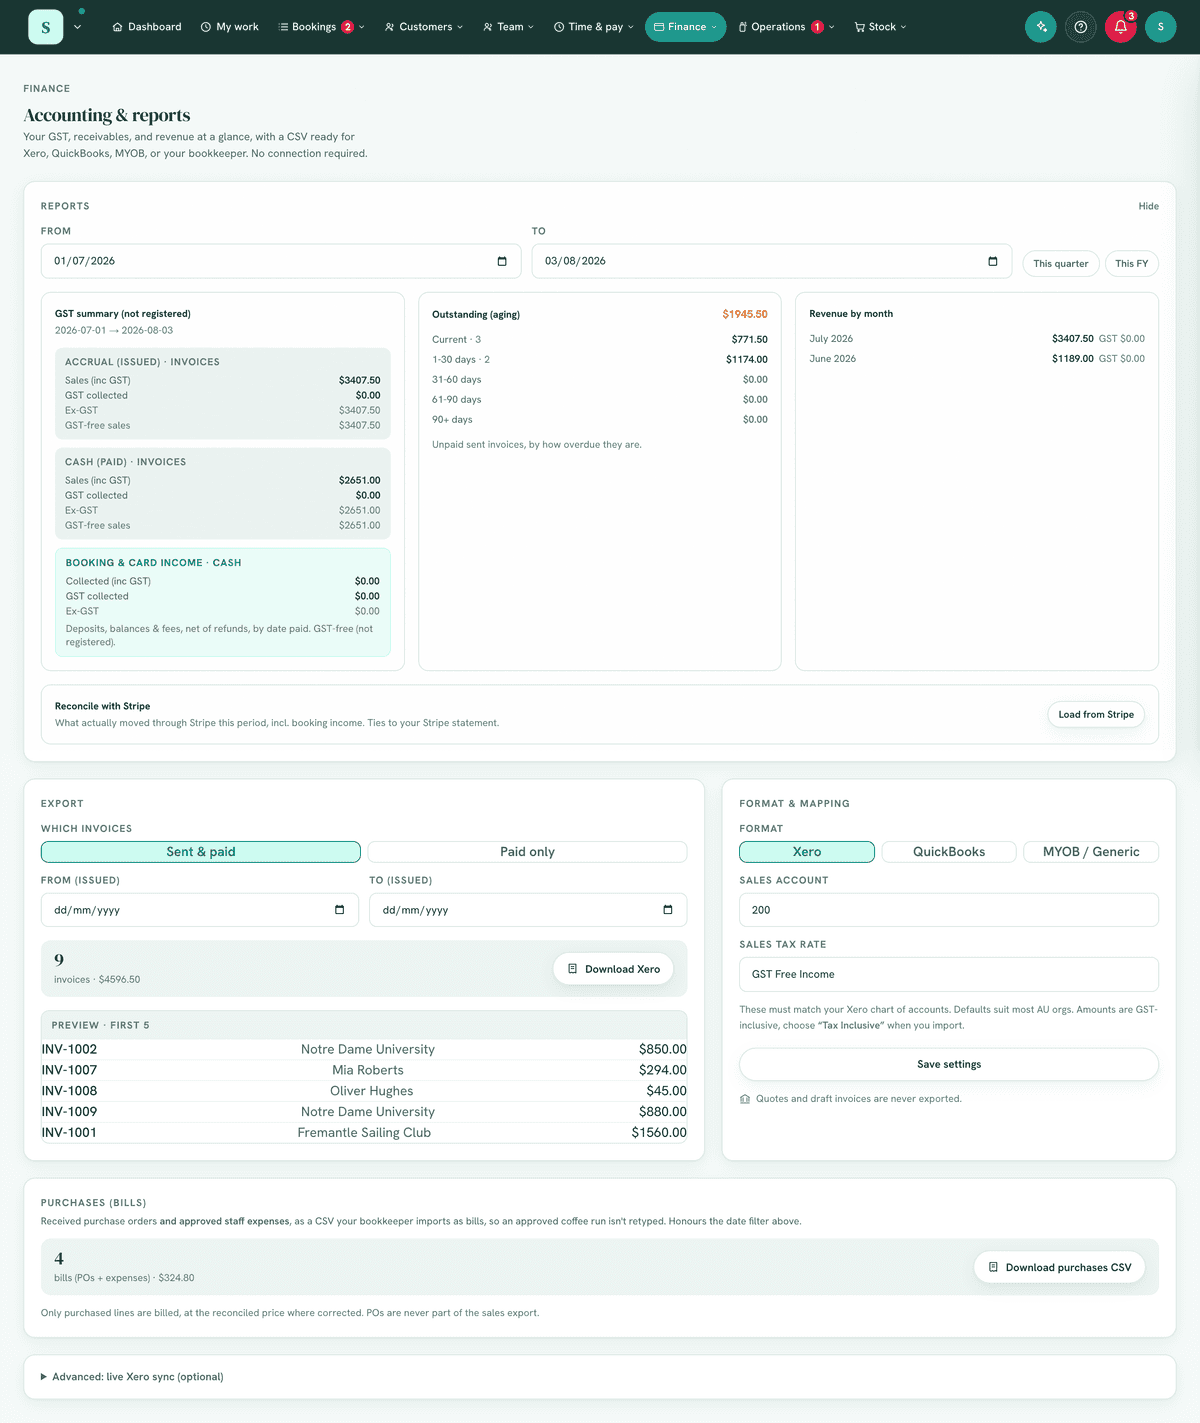
Finance → Accounting & reports. - Under Which invoices, pick Sent & paid (everything you've issued) or Paid only (money actually received).
- (Optional) Set From and To dates to limit to an issue-date range, e.g. a single BAS quarter.
- Check the summary: it shows how many invoices match and their total. Glance at the Preview to confirm it looks right.
- Select Download Xero / Download CSV.
- The file downloads as
yourbusiness-invoices-<format>-<date>.csv.
7c. Import into your accounting software
- Open your accounting software's invoice/sales import.
- Upload the CSV.
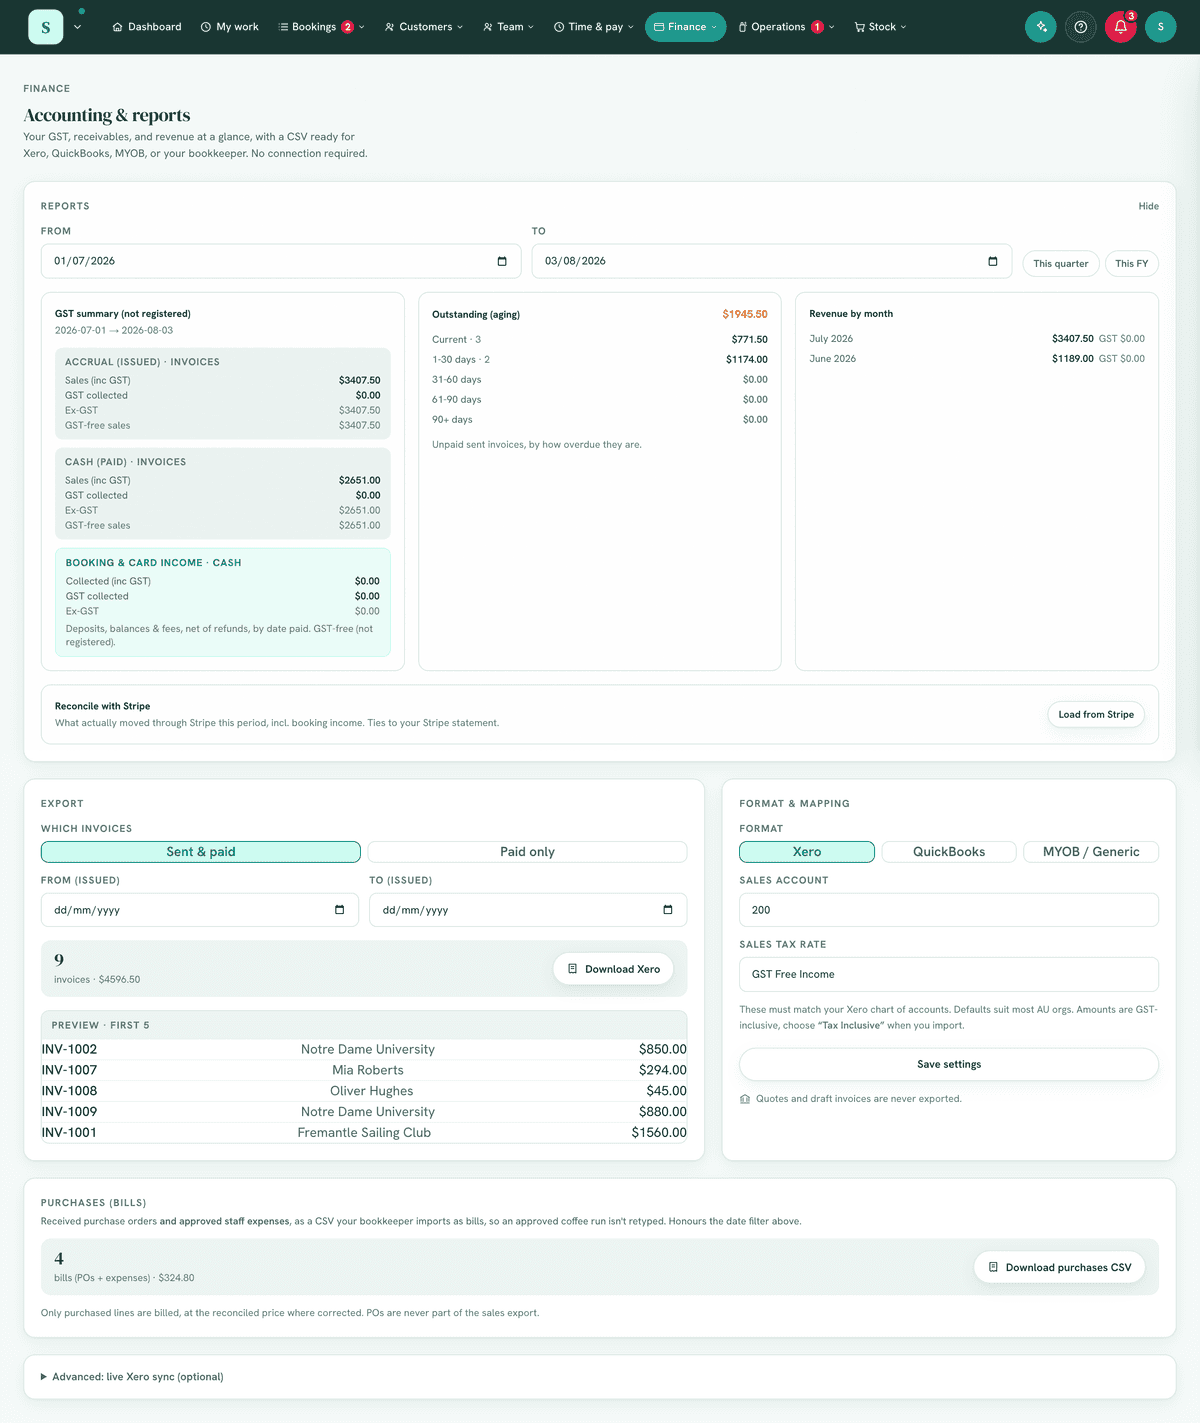
- Important (Xero): amounts are GST-inclusive, choose the "Tax Inclusive" option during import so tax isn't added twice.
- Map columns if prompted (the Generic/MYOB format uses plain, self-explanatory headers), then complete the import.
7d. Connect Xero and push documents as drafts (live sync)
If you use Xero, you can skip the CSV and push straight in.
- Open
Settings → Connections(your business name, top-left, then Settings) and on the Xero card select Connect Xero. Sign in at Xero and choose your organisation; everything lands in your own books. (New to Xero? Use the Setup guide button there, a plain-English printable walkthrough.) The Accounting setup button brings you back to this page. - Use the live dropdowns. In Format & mapping, the Sales account and Tax rate fields are now live dropdowns drawn from your Xero org, pick the revenue account and tax rate you want sales to land on, then Save settings. (This avoids typos: the tax rate must exist in Xero, and picking it from the list guarantees a match.)
- Push. Set your filters as usual (Which invoices / date range), then use the Sync to Xero panel: Push an individual document, or Push N to Xero to send the whole filtered set. Each row shows a Synced badge when done, or Retry if it errored.
What to expect:
- Everything arrives in Xero as a DRAFT, Xero stays the source of truth. You review and approve in Xero; nothing posts to your ledger automatically.
- Amounts are GST-inclusive, matching how you'd import the CSV.
- Re-pushing is safe (idempotent): pushing the same document again updates the same draft in Xero rather than creating a duplicate.
- A booking paid in instalments stays ONE Xero draft. A deposit receipt and a balance receipt each describe the whole booking (that is what makes each of them a valid tax invoice), so they share a single Xero draft for that booking and the sale is never counted twice. If you have already raised an invoice for a booking and pushed it, that booking's receipts stay out for the same reason, and the row tells you so.
- Only real documents go: a draft invoice or quote you are still writing, and a purchase order still waiting for approval, are refused with a sentence.
- It does not push payments, a paid invoice still arrives as an unpaid draft to reconcile in Xero.
- MYOB / QuickBooks stay CSV-only; use the export panel for those.
7e. Choose what goes, and whether it goes by itself
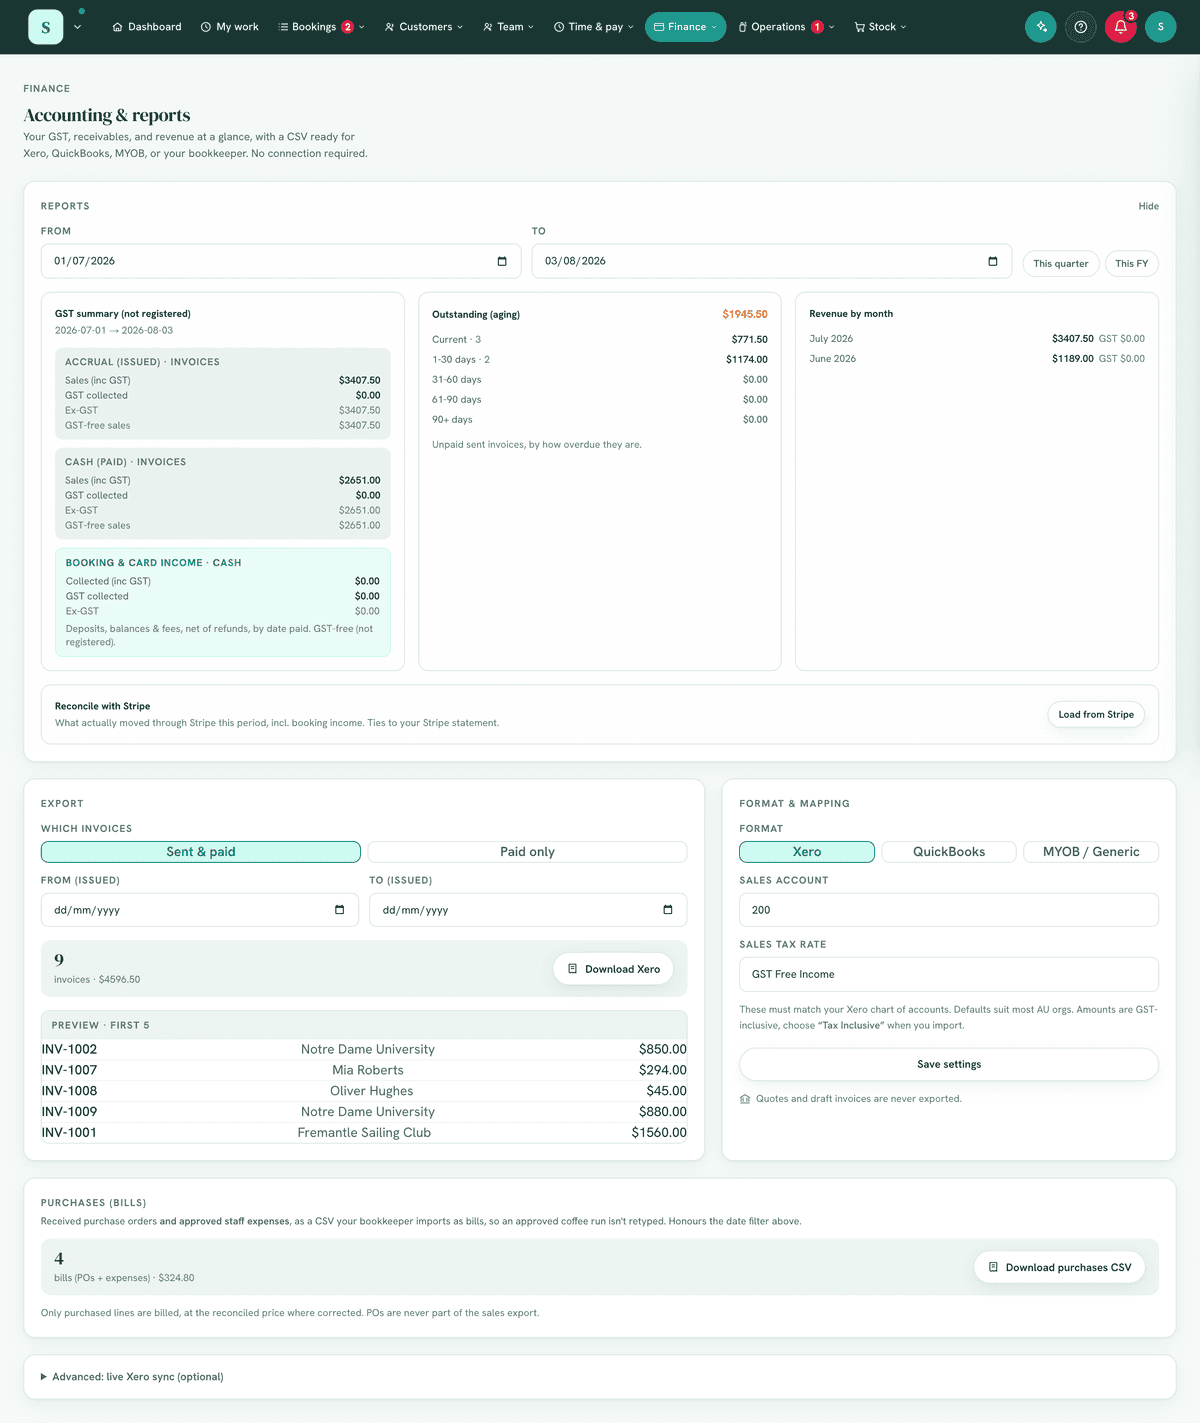
Once Xero is connected, a Xero sync box appears under Format & mapping. Everything in it is off by default, and it asks two separate questions, under two headings.
What can go to Xero. Invoices need no tick, they are always available. The rest are opt-in, and a kind you have not ticked never reaches Xero by either route and is not even listed in Sync to Xero:
- Payment receipts, every booking deposit, balance and membership payment already writes a receipt here, and this sends each as a draft Xero invoice. This is the one for a business that takes deposits and never raises an invoice.
- Quotes, a quote you have sent (or the customer accepted) becomes a draft Xero quote.
- Purchase orders, an approved or sent purchase order becomes a draft Xero purchase order, booked to the expense account you chose in this same panel.
How it gets there. Two more switches:
- Send automatically, everything you have ticked above pushes itself (still as drafts) every six hours, with no manual Push click. Leave it off and nothing moves until you press Push yourself. Approved staff reimbursements go over the same way, as draft bills, once an expense account is set.
- Credit note on refund, when you refund a card payment, a matching Xero credit note posts automatically, so the books reverse without re-keying. This is the one exception to the drafts rule: a credit note posts approved, because a refund that sits as a draft has not reversed anything.
Where the automatic sync starts. Under the ticks is Only send documents dated on or after, and it matters more than it looks. The automatic sync sends anything finalised that is not in Xero yet, which on its own would mean your whole history: tick a box on a Friday and several hundred old drafts could appear in Xero over the weekend, in periods your accountant has already closed and filed.
So the first time you switch any of these on, today's date is filled in for you, and everything dated earlier is left alone. You are free to change it:
- Move it back to send older paperwork too, as far back as you like.
- Clear it to send everything you have. The panel says so plainly when it is empty, because that is rarely what people mean.
This only ever restrains the automatic sync. The Push button always sends exactly the document you clicked, however old it is, because clicking Push is a decision rather than an accident.
Check the organisation before you trust it. Select Check my Xero setup and it reads your Xero once and reports, in one list, whether the sales account, the GST rates, the purchase account and rates, the start date and your pay calendars are all actually there. This is worth doing the day you connect: HappierBiz matches accounts by code and tax rates by name, and every Xero organisation names them differently, so a mismatch would otherwise surface as a refusal in the middle of doing something else. Anything needing attention is listed with what to fix. It checks the choices as they stand on the screen, saved or not, so you can try a dropdown before you save it.
Tick what you want, then select Save settings.
Try the Demo Company first. Test these on Xero's Demo Company to confirm they post the way you expect, then switch them on for your live org.
Timesheets are separate. Hours never ride this six-hourly sync. They go from the pay run instead: see Roster & timesheets for the Xero payroll card on the Pay prep & export page, which can send a period the moment you finalise it.
7f. Export the money you actually took (no invoices needed)
If you take a deposit on a card, take the balance on the day, and never raise an invoice, the export above has nothing to give you. Money received is the one you want.
- Open
Finance → Accounting & reportsand scroll to Money received. - Pick your dates. There are buttons for This month, Last month, This quarter so far and Last quarter, or type any range you like.
- Check the count and total, and glance at the preview.
- Select Download. The file is named
yourbusiness-money-received-<format>-<from>_<to>.csv.
What is in it. One line for every movement of money:
- booking deposits, balances, full payments and cancellation fees,
- membership dues, named by plan,
- refunds, as negative lines.
Each line carries the date the money arrived, the customer, what they bought, the booking reference, how they paid, and the amount with its GST worked out.
Five things worth knowing:
- It is dated by when the money arrived, not when it was typed in. If you take cash on the Tuesday and record it on the Thursday, the line says Tuesday, because that is the day it belongs to for tax.
- A deposit and a balance are two lines, not one. They are often in different months, and often in different BAS quarters, so combining them would put money in a period it had not arrived in yet.
- A refund is its own line, dated the day you refunded it, not the day of the original sale. That is the period the adjustment belongs to.
- Payments on a booking you also invoiced are left out, and the panel says how many and how much. Their income is already in the invoices export, and importing both would count the same sale twice. There is a tick box to include them anyway, for when you are not importing the invoices file.
- It ties to your BAS worksheet. The total is the same money as Booking & card income in the worksheet at the top of the page, line by line instead of one figure. GST is worked out on each payment, so the GST column can differ from the worksheet by a cent or two of rounding.
If you take cards, your bank shows one batched Stripe payout, not each payment. Use Reconcile with Stripe in the panel above to tie the payout to these lines.
7f-i. Invoice a booking, and make it balance against the bank
This is the most common question a business with deposits asks, so here is the whole thing in one place.
Say a party is $486, they paid a $110 deposit on the card, and $107.83 turned up in your bank. Three different numbers, and all three are correct.
Raise the invoice from the booking. Finance → Invoicing, then From a
booking. Pick it, and the lines are itemised for you.
The invoice knows about the deposit. It shows:
| Total (inc GST) | $486.00 |
| Less already paid | -$110.00 |
| Amount due | $376.00 |
The deposit is listed by name and date under Already received, and the emailed copy, the printed copy, the customer's online copy and the Pay now button all show the same $376.00. You do not record the deposit again: it is already counted.
Where the missing $2.17 went. Your card processor takes its fee before the money reaches your bank, so a $110.00 payment arrives as $107.83. The fee is a business expense in its own right, and for an Australian business it carries GST you can claim. Use Reconcile with Stripe on this page for the exact figures: it lists every payment with its fee and what was actually paid out, and downloads as a CSV.
You do not have to work the fee out yourself. The CSV does the arithmetic for you, one row per payment, so you can type it straight in:
| Date | Type | Description | Gross | Fee | GST in fee | Net |
|---|---|---|---|---|---|---|
| 2026-08-12 | charge | Deposit | 110.00 | 2.17 | 0.20 | 107.83 |
Gross is what your customer paid, Net is what reached your bank, and Fee is the difference. GST in fee is the GST inside that fee, taken from what your card processor actually reported rather than worked out by dividing, so it is right whether or not the advertised rate included GST.
If the GST in fee cell is blank, your processor broke out no GST for that payment. Blank rather than 0.00 on purpose: it means go and look, not that there is nothing there.
How to balance it in your accounting package. Two ways, both normal:
- The simple way. When the deposit arrives in your bank, match it to the invoice and add the fee as a bank fee adjustment on the same reconciliation. The invoice clears at $110.00, the fee is booked as an expense, and the bank line agrees at $107.83.
- The tidy way, and the one a bookkeeper will ask for once you have any volume. Stripe gets its own account in your books and everything flows through it, so one payout line can be matched against several sales at once. Full instructions in 7f-ii below, including the Xero setting that catches people out.
Only import ONE of the two files for the same sale. If you raise invoices, import the invoices export and leave Money received alone: it deliberately leaves invoiced bookings out for exactly this reason, and says how many it left out. Importing both would count the sale twice and charge you GST twice.
A tax invoice, not just an invoice. For the document to head itself Tax
Invoice you need to be registered for GST and have your ABN saved. Add it in
Settings → Invoice & tax details.
Not sure which method suits you? Neither is wrong. Ask whoever does your BAS which they would rather reconcile, and set it up that way once.
7f-ii. Set up Stripe in Xero, once
Ten minutes now, and card money reconciles itself from then on. Written for Xero because that is what most people ask about. MYOB and QuickBooks use different words for the same idea.
Why the simple way stops working. Stripe does not send your money over one payment at a time. It gathers up everything it has settled and sends you one lump, so a Saturday with three parties arrives in your bank as a single line. You cannot match that one line to three invoices and add three fee adjustments one by one.
Check your own schedule under Finance → Money owed → Payouts. It tells you how often
Stripe pays you and how long the money takes to arrive.
🛑 Read this before you set anything up
Xero can match Stripe fees for you automatically, but only for invoices your customer paid on a Xero online invoice. Xero's own words: "Automated fees don't occur if Stripe is set up as a payment gateway in Xero and payment is received through a third party app or website."
Your customers pay on your booking page here, so as far as Xero is concerned those are payments completed outside of Xero. That is not a problem, it just means you enter the fee yourself rather than Xero doing it. Everything below assumes that, because it is your situation.
The one-time setup
In Xero, go to Accounting → Bank accounts → Add Bank Account and search for Stripe.
- If Xero offers you a Stripe direct feed, take it. Connect it and Stripe will import your charges, fees and payouts as statement lines by itself. That is the data entry done for you, and it is worth the five minutes.
- If it does not, add the account manually instead, name it Stripe, currency AUD, and leave the account number blank. You are creating a holding account, and it works exactly the same way with a bit more typing.
While you are there, make sure you have an expense account for card fees. Most charts of accounts already have Bank Fees.
What you do from then on
Step 1. Bring in the sales. Download from this page and import it into Xero.
| If you | Download |
|---|---|
| Raise invoices for your work | Export CSV (the invoices file) |
| Take card payments and never invoice | Money received |
⚠️ Never import both files for the same sale. Money received already leaves out bookings you invoiced, and tells you how many it left out.
Step 2. Mark those sales as paid into Stripe. They arrive in Xero as awaiting
payment, because the file records the sale, not where the money went. Receive the
payment against your Stripe account, at the full amount the customer paid, not
the amount that reached your bank. From Business → Invoices → Awaiting payment you
can do a batch at once.
Step 3. Reconcile the payout. On the Reconcile tab, find the Stripe payout line.
- Click Find & Match and tick the invoices that payout covers. Xero can group several against one statement line, which is the whole reason for doing it this way.
- The difference left over is the Stripe fee. Add it as a bank fee adjustment on the same screen, coded to Bank Fees. Xero recommends exactly this when fees are not automated. Use the tax rate your accountant uses for card fees: Stripe charges GST on its Australian fees, and Reconcile with Stripe on this page gives you the exact figures from what Stripe itself reports rather than from a guess.
⚠️ Do not let Xero create a "receive money" for these. When a statement line has no match, Xero offers to create one. If you have already imported the sale, that would record the same income twice: once as the invoice and once as the receive money. Always Find & Match against the invoice you imported.
Xero says to reconcile Stripe lines in date order, and that manual payouts have to be reconciled by hand. Both are worth knowing before you start.
How to check it is right
Your Stripe account balance in Xero should equal the balance showing in your Stripe dashboard. If it does, every sale, every fee and every payout is accounted for.
If it does not, the difference is almost always one of four things:
| Difference | What it usually is |
|---|---|
| A payment you took near the end of the period | Money that had not paid out yet. Not an error, it lands next period. |
| A refund or chargeback | Xero wants these entered as credit notes, then matched with Find & Match. |
| A small monthly amount | A Stripe subscription or account fee. Spend money, coded to Bank Fees. |
| A large unexplained amount | A dispute. Check your Stripe dashboard first. |
You may not need any of this. If you take a handful of card payments a month and each one pays out on its own, the simple way in 7f-i is perfectly correct and much less work. This earns its keep when payouts start arriving as lumps.
Whichever way you choose, choose one and stay with it. Half a period done one way and half the other is the thing that takes an afternoon to unpick.
7g. Export what you spent, with the GST you can actually claim
The Purchases (bills) panel exports two things together as one bills CSV: your received purchase orders and your approved staff expense claims. So the coffee run you approved on your phone reaches your bookkeeper without anybody retyping it.
The important part is the tax code on each line. Xero, MYOB and QuickBooks all work out the GST from the code when they import, so a line coded as taxable claims a eleventh of it back whether or not there was any GST in it. Australian small business spend is full of purchases that carry none: unprepared food, most basic groceries, some health services. So each line is coded from what your records actually say:
| What your record says | How it exports | What it claims |
|---|---|---|
| A purchase order line you ticked GST-free | GST-free code | nothing, correctly |
| A claim with the GST filled in | taxable code | exactly that GST |
| A claim with GST of 0 | GST-free code | nothing |
| A claim with the GST left empty | GST-free code | nothing, and the panel tells you |
One receipt, both kinds: it becomes two lines. A $110 supermarket docket with $4.00 of GST printed at the bottom is not a taxable purchase and not a GST-free one. It is $44.00 of taxable goods and $66.00 of GST-free food. The export splits it at the GST you recorded and labels the two lines (taxable part) and (GST-free part), which claims exactly the $4.00 that exists. One line coded taxable would claim $10.00 you never paid; one line coded GST-free would give away the $4.00 you did.
When you have left GST off a claim, the panel says how many, what they add up to,
and roughly what the credit could be worth, for example "2 claims have no GST
recorded ($320.00) ... that could be up to $29.09 of GST you're entitled to." Add
the GST off each receipt in Finance → Expenses and it appears here. Nothing is ever
claimed on your behalf from a figure nobody entered.
The panel's GST figure equals 1B on the BAS worksheet at the top of the page, to the cent. If the two ever disagree, tell us, because one of them is wrong.
You need a tax invoice to claim the GST on anything over $82.50. The readable CSV has a Receipt column so you can see which purchases have one attached, and the worksheet warns you about the ones that do not.
7g-i. Send your accountant the receipts, not just the figures
The CSV tells your accountant a receipt exists. The receipts themselves below it hands them the documents.
Press Download the receipts and you get one zip of every receipt in the dates you
set above, each file named 2026-07-14 Zoho Australia 42.50.pdf, so the folder sorts
itself by date and each file matches a row in the CSV. Inside is a receipts.csv
listing every file with its date, supplier, description, category, amount and the GST
recorded, which is the sheet an accountant reads with the folder open beside it.
For a whole financial year, set From 1 July and To 30 June in the Export panel above, download the purchases CSV, then download the receipts. Two files, and your accountant has both the figures and the paperwork behind them.
It covers staff expense claims that were approved or reimbursed, and received purchase orders, which is exactly what the purchases CSV covers. Company card spending is included: money the business spent on its own card is still a purchase.
It never stops quietly. If a period is too large for one download it stops, tells you the date it reached, and puts a note inside the zip naming the date to start the next download from. If a receipt cannot be fetched it is named in that note too, so nobody is left wondering which row has no document. And the screen tells you how many purchases in the period have no receipt attached at all, because that is the number your accountant will ask about.
The ATO wants your records kept for five years from when you got them, and a digital copy is fine. Downloading the year is also how you keep a copy somewhere that is yours.
7h. Read the BAS worksheet, and know when it is due
The panel at the top of the screen is your own figures arranged the way the Business Activity Statement asks for them. Under Simpler BAS, which every business under $10m turnover lodges, the ATO asks for three GST figures and this leads with those three:
- G1 total sales, including GST
- 1A the GST on those sales
- 1B the GST on your purchases, which you claim back
and then the net, which is 1A less 1B: what you pay, or what comes back to you.
Pick a whole period, never a part of one. Use the Q1 to Q4 buttons, the Full year button, or the monthly dropdown if you lodge monthly. A BAS covers a whole quarter, month or year, so if you type your own dates the worksheet labels itself a custom range and tells you it is not a figure to lodge.
It tells you when it is due. The ATO's quarterly dates are 28 October, 28 February, 28 April and 28 July, and the February one catches people out because the December quarter gets an extra month for Christmas. A monthly lodger is due on the 21st of the following month. The worksheet prints the date beside the period, counts the days, and if a registered tax or BAS agent lodges for you it shows their later date too. If a due date lands on a weekend it rolls to the Monday, as the ATO allows; a public holiday in your state can move it again.
Cash or accrual: use the one you registered for, and never mix them. Cash counts money on the day it moves, which is how most small businesses report. Accrual counts a sale when you invoice it, paid or not.
Read the notes under the figures before you lodge. Everything the app cannot know is written there rather than guessed at: a purchase with no GST recorded, a booking that looks like it has been counted twice, a period that has not finished, a refund from before the app dated refunds properly. If the worksheet ever says your figures do not tie, stop: something has been recorded with GST that does not match its own amount, and it needs a person to look at it before anything is filed.
CSV and Print give you the whole worksheet, workings and warnings included, to save as a PDF or email to your accountant.
🛑 It is a worksheet, not tax advice and not a lodgement. It shows your own records with the workings beside them, for you and a registered tax agent to check.
8. Examples
Beginner. A sole-trader tutor wants last month's income in QuickBooks. They set Format = QuickBooks, leave Which invoices on Sent & paid, set the From/To dates to last month, download the CSV and import it.
A cafe that never invoices. A party venue takes a card deposit when the booking is made and the balance on the day, and has never raised an invoice in its life. Its invoices export is empty, so it uses Money received instead: set Format = Xero once, then each month press Last month, download, and import. Every deposit and balance lands in Xero on the day it was actually paid.
Real-world business. A GST-registered salon does its quarterly BAS. They use Format = Xero, Sales account code = 200, Tax rate name = GST on Income. Each quarter they set the date range to the BAS period, choose Paid only to report cash received, download, and import into Xero as Tax Inclusive.
Advanced. A bookkeeper is given a read-only login. The owner creates a Bookkeeper role with only View / export accounting (and perhaps View invoices), so the bookkeeper can pull exports each month without seeing rosters, customers or settings.
9. Reports & exports
This module is the export. The outputs are CSVs:
- Invoices, one row per invoice line item, in your chosen package's shape.
- Money received, one row per payment or refund, in the same shape (see 7f).
- Bills (purchases) CSV, the Purchases (bills) panel exports received purchase orders (see Invoicing) and approved expenses and bills (see Expenses) as an accounts-payable CSV your bookkeeper can import as bills, in your chosen package's shape. Every line carries its own tax code and GST amount worked out from the GST you recorded, so nothing GST-free claims GST back (see 7g). Only lines marked purchased are included, at the reconciled price where corrected; it covers the page's dates. A bill goes in as the supplier's own document: numbered with their invoice number where you recorded one, carrying its real due date, and its reference says unpaid or paid with the date, so your bookkeeper can see what is still outstanding.
Only invoices with status Sent or Paid (and document type invoice) are ever included in the sales export, purchase orders are never mixed into your sales figures.
10. Common mistakes
- Expecting quotes or drafts to appear. They're deliberately excluded. Send the invoice first; only then is it exportable.
- Leaving the GST off an expense claim and expecting the credit anyway. Nothing is claimed from a figure nobody entered. The purchases panel names the amount at stake so you can go and fill it in.
- Downloading the purchases file with no expense account set. Every package needs an account (or category) on each line of a bill. The panel warns you before you download; set it in Format & mapping.
- Importing into Xero without "Tax Inclusive". Amounts are GST-inclusive, not choosing Tax Inclusive double-counts GST.
- A tax-rate name that doesn't match Xero. The Tax rate name must match a rate that already exists in your Xero org, character for character, or Xero rejects the rows.
- Wrong "Which invoices" choice. Sent & paid reports everything issued (accruals view); Paid only reports cash received. Pick the one your accountant expects.
- Date filter confusion. The From/To dates filter on the issue date, not the paid date.
- Recording a booking's deposit again on its invoice. It is already counted: the invoice shows it under Already received and takes it off the amount due. Typing it in a second time makes the same money count twice, and the invoice screen warns you when an entry looks like a repeat of one.
- Setting the GST-free tax rate to a rate that charges GST. They are two different rates and each does one job. Your package works the tax out from the name, so GST-free income sent under "GST on Income" comes back with GST added to it. The screen warns you if the two look wrong.
11. Troubleshooting
| Problem | Likely cause & fix |
|---|---|
| The invoice I raised from a booking asks for the full amount | It shouldn't. Check the deposit shows under Already received on the printed copy. If the booking's payment isn't there, the invoice was raised without picking the booking, so nothing links them. Raise it again through From a booking. |
| My bank shows less than the invoice | Your card processor's fee comes off before the money lands. Reconcile with Stripe gives the fee per payment, and the fee is a claimable expense. See 7f-i. |
| The same payment shows on the invoice twice | Somebody recorded the booking's deposit by hand as well. Void the hand-typed entry in the invoice's Payments panel and keep the booking's own record. |
| A Stripe payout does not match any one invoice | It won't, and that is normal. Stripe gathers up everything it has settled and sends one lump, less its fee, so a busy Saturday arrives as a single bank line covering several sales. Use Find & Match in Xero against the sales it covers, then add the leftover as a bank fee adjustment. Set it up once, see 7f-ii. |
| I don't know when card money reaches my bank | Finance → Money owed → Payouts states your own schedule, read live from your Stripe account. |
| The Download button is greyed out | No invoices match your filters. Widen the date range or switch from Paid only to Sent & paid. |
| An expected invoice is missing from the file | It's still a quote/draft, or its status isn't Sent/Paid, or its issue date is outside your From/To range. |
| Xero rejects the import with a tax-rate error | The Tax rate name doesn't match a rate in Xero. Copy the exact name from Xero into the field and save. |
| GST looks doubled in Xero | You didn't choose Tax Inclusive on import. Re-import with that option. |
| Wrong account in Xero | Update the Sales account code to the correct code from your chart of accounts and re-export. |
| The Accounting menu isn't visible | The module is off, it's not in your plan, or your role lacks View / export accounting. |
| Download the receipts says there is nothing to download | No purchase in those dates has a receipt attached. It also tells you how many have none, which is the thing to fix: open each in Finance → Expenses and attach it, or forward it to your receipts address so it attaches itself. |
| The receipts zip has fewer files than the CSV has rows | A row with no receipt attached has no file to include, and the screen counts those separately. If the zip also holds an about-this-download.txt, open it: it names every receipt that could not be included and why. |
| The receipts download stopped part way | A period can hold more than one download can carry. The note inside the zip gives the date to set From to, and downloading again picks up where it left off. |
| Totals don't match Payments | The invoices export covers invoices; Money received covers card and cash payments. They can legitimately differ if not every booking is invoiced. |
| The invoices export is empty but you know you have taken money | You take payments without raising invoices, which is normal. Your income is in Money received below it, and the empty panel now says so. |
| Money received says payments were "left out" | They are on bookings you also invoiced, so that income is already in the invoices file. Tick Include them anyway only if you are not importing the invoices file too. |
| A deposit and a balance arrive in Xero as two invoices | By design. They were paid on different days, often in different BAS quarters, so each is dated the day it was actually paid. Search the booking reference to see both. |
| A payment is in the wrong month | Check the date you entered when you recorded it. Money received uses the day the money arrived, not the day it was typed in. |
| A membership line says "Membership" rather than the plan | We can only name the plan when the payer matches exactly one member. Older charges taken before migration 423 have no plan recorded against them. |
| MYOB will not accept the file | MYOB imports Service Sales, under File → Import/Export Assistant → Import → Sales, and asks you to match the columns the first time. Check your Sales account is a real MYOB account number such as 4-1000. |
| GST is being worked out on something that carries none | Mark it GST-free: the offering in Experiences, the plan in Memberships, or the line in Invoicing (see 7a-i). It applies to money taken from then on. |
| You ticked GST-free but last quarter's figures did not change | Working as intended. The setting is recorded against each payment as it is taken, so a BAS you have already lodged never moves under you. Speak to your accountant about a past period. |
| The GST-free tick box is not on the offering or the plan | You are not marked as registered for GST, so there is nothing to distinguish. Set that under Settings → Invoicing & tax. |
| Xero added GST to something that should not have it | Check the tax code in the file. A GST-free line should carry your GST-free rate, not your GST-on-income rate. If it carries the wrong one, the offering was not marked GST-free when that money was taken. |
| The Sync to Xero panel isn't showing | Xero isn't connected yet (use Connect Xero under Settings → Connections), or your role isn't a manager / lacks View / export accounting. |
| A Push fails with a tax-rate error | The tax rate in your settings must match a rate in your Xero org exactly. Now that you're connected, pick it from the dropdown rather than typing it, and Save settings. |
| A save fails after this update | Run migration 239 (the live Xero push). If it isn't applied, pushing invoices won't work. |
| The Automatic Xero sync toggles aren't there | Xero isn't connected yet, the box only appears once it is. If saving the toggles fails, check migration 242 is applied. |
| The sync start date won't save | It needs migration 439. The panel says so rather than saving quietly and losing the date. |
| Automatic sync sends nothing, but Push works | Check Only send documents dated on or after. Anything dated earlier is left alone on purpose. |
| A pushed invoice shows as unpaid in Xero | Expected, the connection pushes invoice drafts, not payments. Mark it paid / reconcile the payment in Xero. |
| Invoices appear as drafts in Xero | Also expected and by design, Xero is the source of truth; review and approve the drafts in Xero. |
| The purchases file will not import: it wants an account on every line | Set your Expense account in Format & mapping (QuickBooks calls it a category). The panel warns you about this before you download. |
| A GST-free purchase claimed GST back in Xero | It should not, and does not now: each line carries its own tax code. If an old file did, it was downloaded before 13 August 2026. Re-download it. |
| One receipt turned into two lines in the purchases file | Working as intended, and it is the correct treatment. The docket held both taxable and GST-free goods, so it is split at the GST you recorded and each part carries its own code. |
| The purchases file claims less GST than you expected | Some claims have no GST recorded, so nothing is claimed on them. The panel names how many and what the credit could be worth. Fill the GST in under Finance → Expenses. |
| A claim's GST was capped in the file | The GST recorded was more than a eleventh of the total, which cannot happen on a GST-inclusive price. Usually a decimal point in the wrong place: check the claim. |
| Several staff claims arrived in Xero as ONE bill | Fixed on 13 August 2026. Their reference numbers could collide, and an importer merges bills sharing a number. Re-download and re-import, then delete the merged bill. |
| 1B claims nothing for your Stripe fees | Stripe did not report any GST on them, so nothing is claimed rather than guessed at. Take the figure from the monthly tax invoice Stripe issues you and add it yourself, or give it to your accountant with the worksheet. |
| The worksheet says your figures "do not tie" | Do not lodge it. A sale has been recorded with GST that does not match its own amount. Send us the worksheet, or give it to your accountant first. |
12. Error messages
The Accounting & reports screen is filter-driven and shows guidance inline rather than error dialogs:
- Download disabled / "0 invoices", your current filters match nothing (see Troubleshooting above).
- "Saved ✓", your format/mapping settings were stored successfully.
- Import errors (tax rate, account code, duplicate invoice number) are raised by your accounting software, not HappierBiz, resolve them there using the Troubleshooting table.