01 · Getting started
This chapter takes you from "never heard of it" to "set up and logged in." It covers creating your business, the free trial, the onboarding wizard, your plans, and how you and your team sign in.
1. System overview
HappierBiz has two sides:
- The back-office (Admin), where you and your team work. You reach it at
…/adminon your workspace and sign in with your email and password. - The public site, what your customers see at your workspace's web address: your booking page, invitation/RSVP links, and an unsubscribe page.
Your plan decides which modules you can switch on; Settings is where you switch them on and customise them; Roles decides who can see and do what.
2. Creating your business (sign up)
Purpose: Create your workspace and your owner account.
Required permissions: None, this is the public sign-up.
Navigation path: The HappierBiz home page → Start free trial / Sign up.
Step-by-step:
- Go to the HappierBiz home page and choose Start free trial.
- Enter your business name. HappierBiz suggests a web address (subdomain) from it, you can adjust this.
- Enter your email and choose a password. This becomes your Owner account.
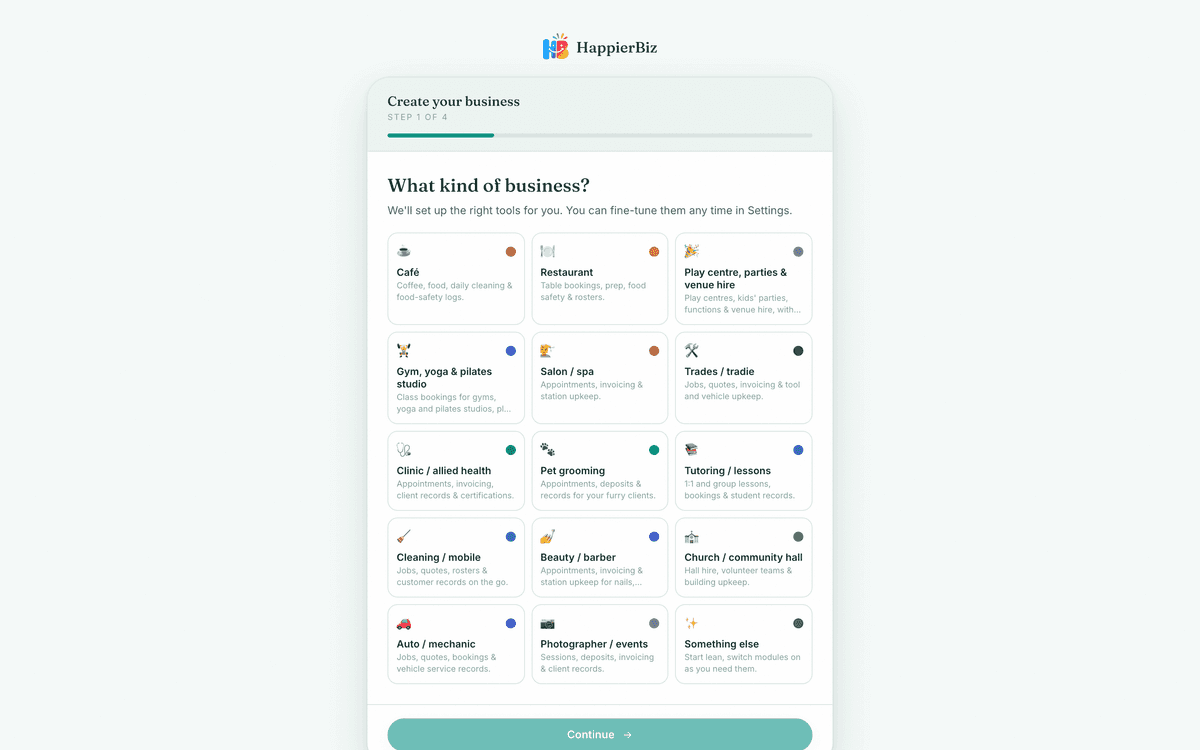
- Choose your business type (Café, Salon, Gym, Clinic, Trades, Venue, etc.). This pre-selects the right modules, wording and a starter theme, all changeable later.
- Continue into the onboarding wizard (next section).
Expected result: Your workspace is created, you're signed in as the Owner, and your free trial starts.
No credit card is required to start. You only enter payment details when you choose to subscribe.
3. The onboarding wizard
When you pick a business type, HappierBiz pre-configures your workspace so it's usable immediately. Depending on the type you choose, it sets up:
- The right modules, e.g. a café gets Bookings, Calendar, Payments, Safety, Roster, Shopping, Team comms and Recipes; a clinic gets Bookings, Customers, Invoicing and Certifications. You can turn any of these on or off afterwards.
- Your wording, what you call a booking and the people in it (e.g. appointment + clients, class + members, party + guests).
- A starter theme, a colour palette and font pairing you can later replace with your own logo and brand colours.
- Starter data, example services with prices and durations, sensible safety or cleaning checklists, a starter shopping list, example equipment to service, and a welcome announcement for your team noticeboard.
Example, choosing "Salon / spa": You start with Bookings, Calendar, Payments, Invoicing, Roster, Team comms and Assets switched on; bookings are called appointments and customers clients; customers can pick their stylist; and you get starter services like Cut & style, Colour and Blow wave with example prices, all editable.
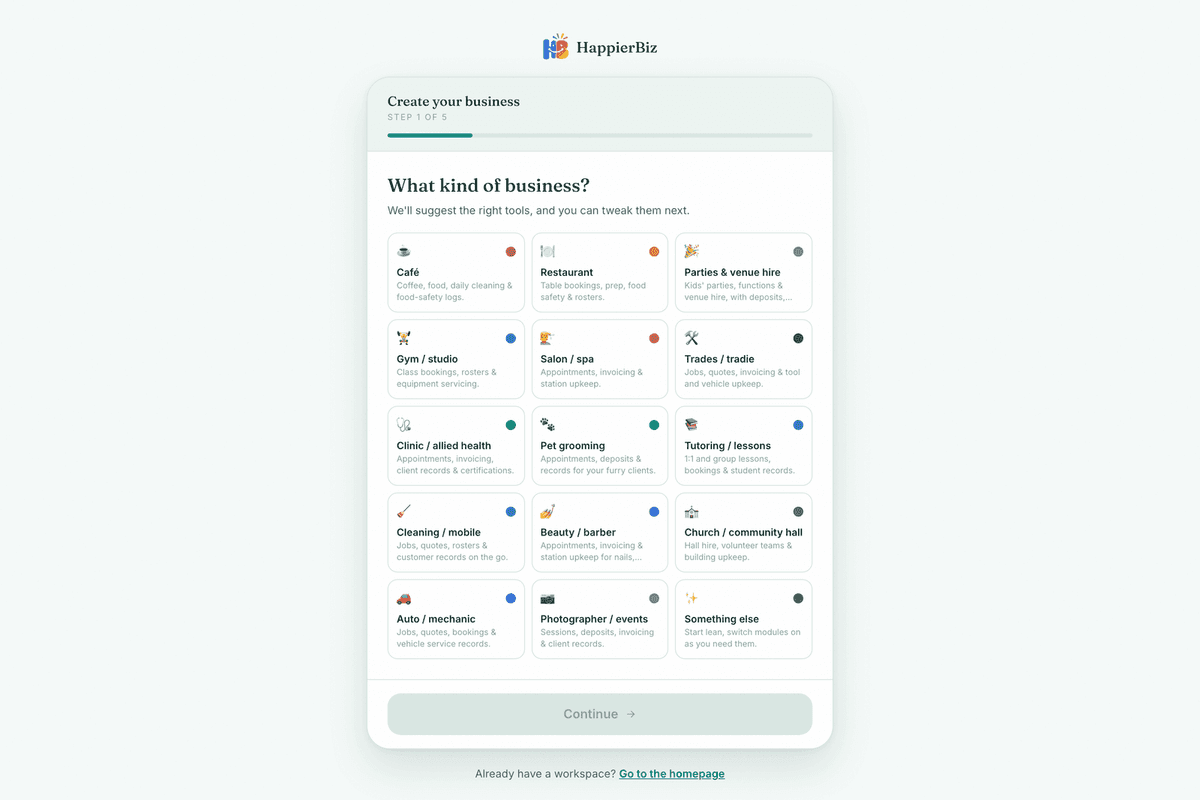
Common mistake: Picking the closest type and assuming you're stuck with its modules. You aren't, everything the wizard sets up is a starting point. Change any of it in Settings.
3a. Example data
A brand-new business is empty, and an empty screen is a bad way to learn what a screen is for. So you can fill it with a few realistic examples: a service or two, some tasks, a safety check, a recipe, a shopping item, a customer, a booking. Only the areas whose modules you turned on get anything.
- Add it: from the setup checklist on your dashboard.
- Everything is clearly an example, and it is yours to edit. Rename one and it simply becomes real.
- Remove it: Clear example data, in the same place.
⚠️ Clearing is deliberately cautious, and it will sometimes keep things. An example is only removed while it is still demonstrably an example: untouched by you, with nothing real built on top of it. If your team has been ticking off the example fridge check every morning, that check now has a month of completed records hanging off it, and deleting it would take those with it. So it is kept, and the reason is shown to you before you confirm.
Keeping something you wanted gone is an annoyance. Deleting a compliance record you needed is not something you can undo, so it errs the other way.
⚠️ One example is a live, public, free booking on your booking page. If your page is already shared, take that experience off Live, or clear the example data, before somebody books it.
4. Your free trial
- Every new business starts on a no-card free trial. The length is set by the operator in Control, so check there rather than trusting a number written here.
- During the trial you have full access to set everything up.
- The trial countdown and your current status are shown on Plan & billing.
- When the trial ends, you subscribe to keep your access. If a subscription lapses, your team sees a reactivate screen and the back-office is locked until you re-subscribe (your data is kept safe, nothing is deleted). The trial-ended email includes a Choose your plan & pay button that takes you straight to your plan options, monthly or annual, and on to checkout.
5. Plans
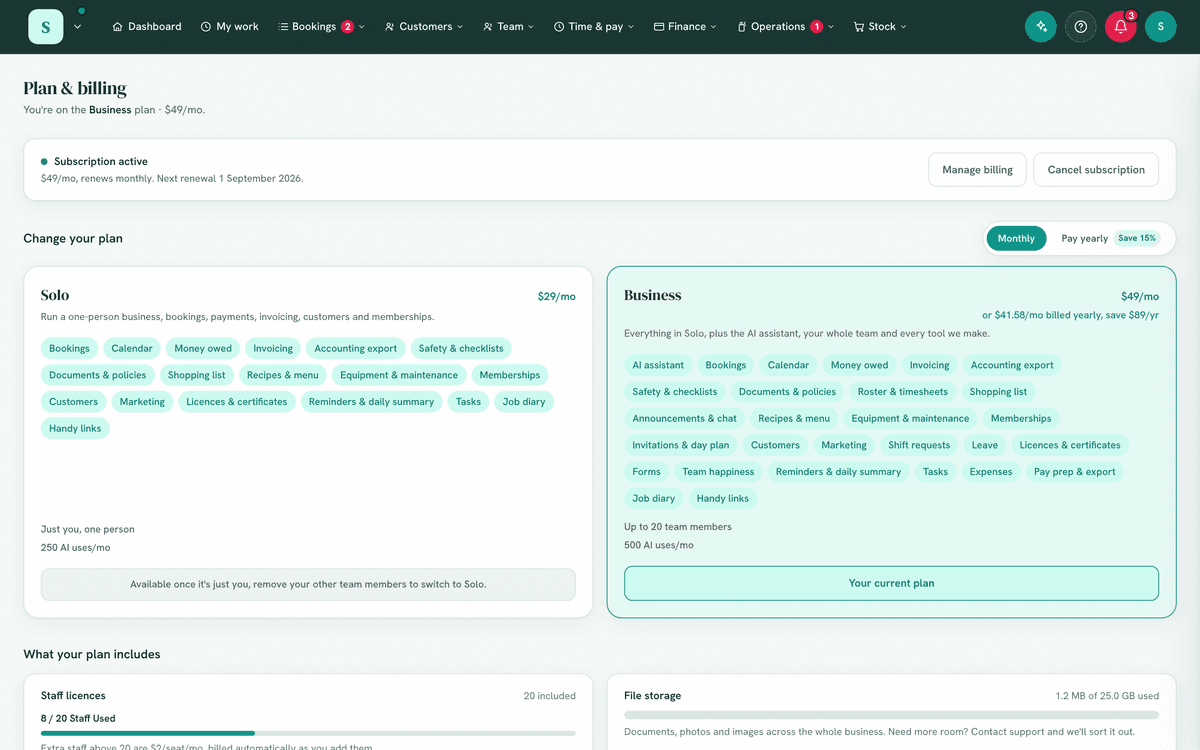
HappierBiz comes with two default plans. Your provider can edit these, so always check Plan & billing for your live plan, price and inclusions.
| Solo | Business | |
|---|---|---|
| Who it's for | Running the day-to-day on your own | Everything, including the AI assistant, team-wellbeing, compliance and stock tools |
| Price | See the pricing page or Plan & billing | Monthly, or pay yearly for less |
| Team members | 1 | 20 included, buy extra seats as you grow |
| Modules included | Bookings, Calendar, Team comms, Payments, Invoicing, Accounting & reports, Roster & timesheets, Customers, Marketing, Shift requests, Leave, Tasks | Everything in Solo, plus AI assistant, Memberships, Invitations & run-sheet, Safety & cleaning, Documents, Licences & certificates, Team happiness, Shopping list, Recipes & menu, Forms & workflows, Reminders & digests, Assets & maintenance |
A module that isn't in your plan appears locked; upgrade on Plan & billing to unlock it. Switching modules on/off within your plan is free and instant.
When to choose which: Choose Solo if you run the business yourself and mainly need bookings, money and a simple roster. Choose Business if you have a team, need compliance/safety/documents, want the AI assistant, or want every current and future tool included.
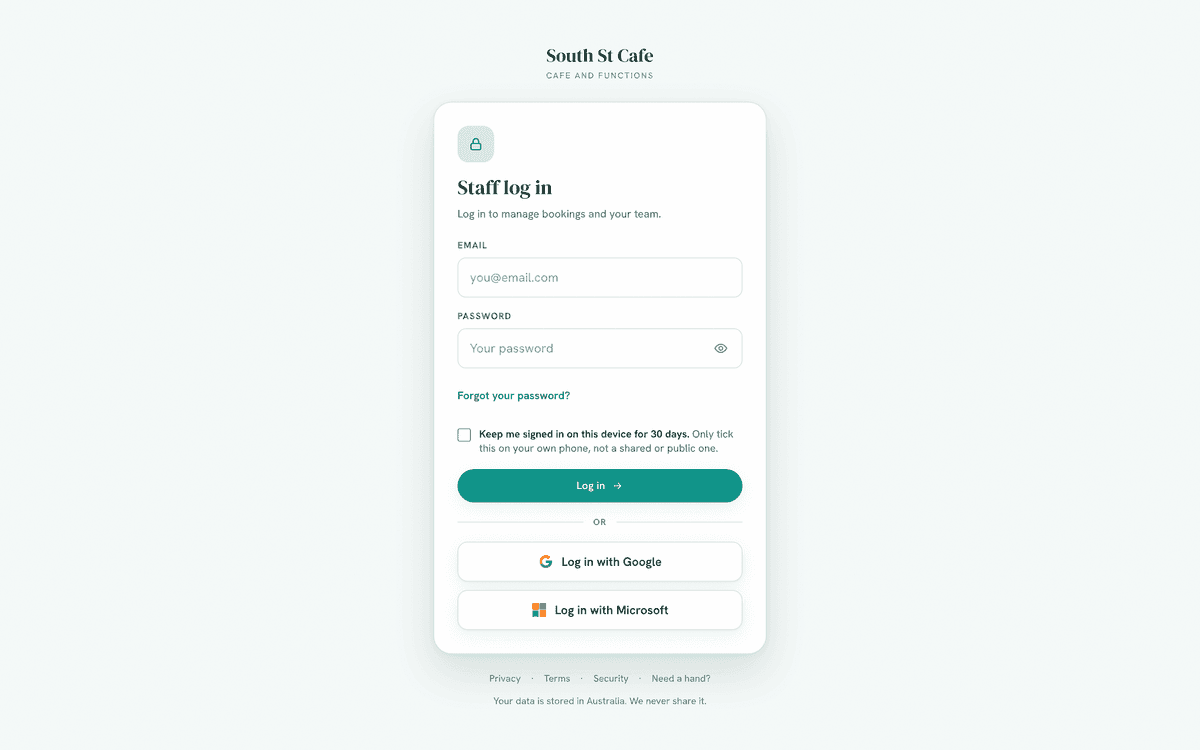
6. Logging in
Purpose: Get into the back-office.
Navigation path: Your workspace's …/admin address (or the Log in link on
your site) → enter email and password.
Step-by-step:
- Go to your workspace login page.
- Enter your email and password.
- Select Log in. You land on the Dashboard.
If you've forgotten your password: Choose Forgot password on the login page and follow the email link to reset it.
First login for staff you've added: If a manager created your account with a temporary password, you're asked to set your own password before you can use the back-office.
Troubleshooting:
| Problem | Likely cause & fix |
|---|---|
| "Access removed" message | Your access was switched off by a manager. Contact your manager. |
| "Account paused" message | The whole workspace is paused. Contact support/your owner. |
| A reactivate screen appears | The subscription has lapsed. The owner needs to re-subscribe on Plan & billing. |
| Nav shows only Dashboard + Messages | A session sync issue, sign out fully and back in. If it persists, tell your administrator. |
7. Switching between businesses
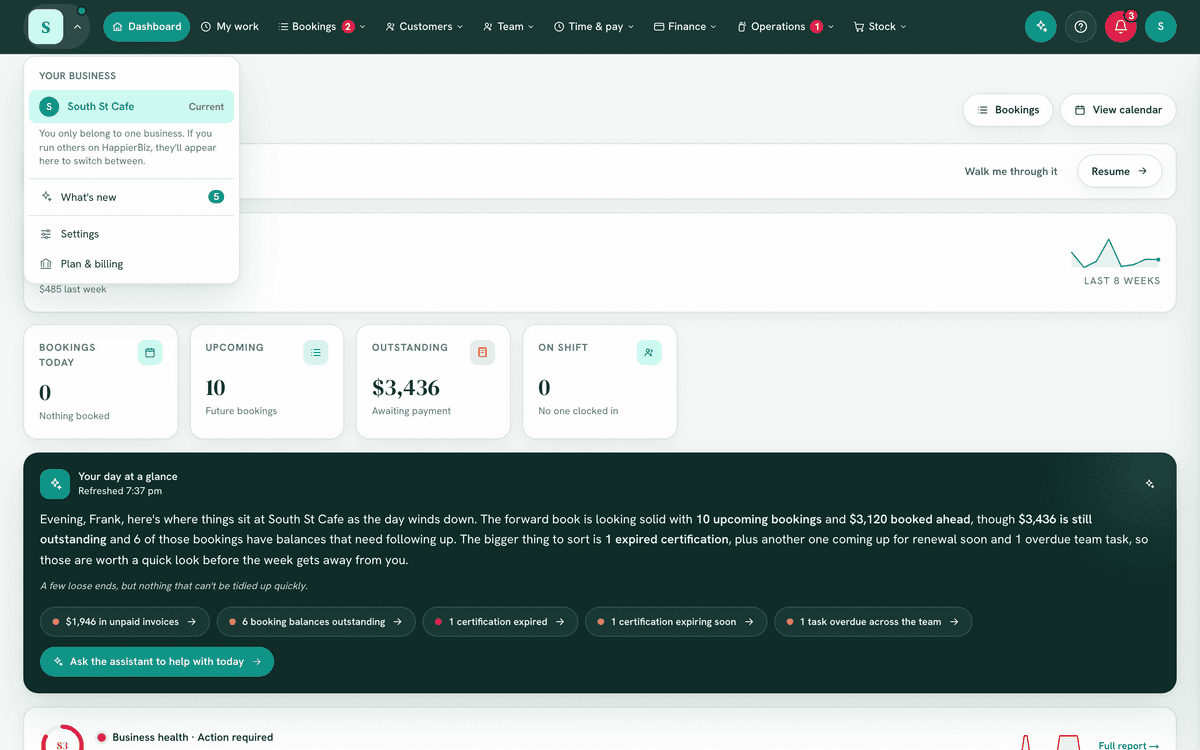
If you belong to more than one HappierBiz business (e.g. you manage two venues), use the workspace switcher, the logo/name button at the top-left of the back-office, to jump between them. If you only belong to one, this menu simply shows your current business.
Next: User roles & permissions.